Monday, December 9, 2013

Joyful Stars December Blog Hop

Welcome to the Joyful Star Blog Hop for December! If you're coming from Krista's blog you're on the right track. It's a circular hop so if you're just starting here then you can just go 'round till you end up here or you can check out the whole list on Joyce's blog.

My projects for this month's hop are the table decorations I made with the Art Philosophy Cricut cartridge.

For Thanksgiving, I used the cartridge to make little turkeys for each plate. Darling, huh? And so simple!!!


I cut leaves at 2 1/2" from 3 colors of cardstock and the center image from CCR to get it to the right size (sorry, I don't know what it ended up being because I didn't save it, darn!)


For my church's Women's Christmas Coffeehouse, I used the Art Philosophy cartridge and cut ornaments out of black cardstock. 


I then used white pigment ink to messily sponge the edges to resemble the chalkboard effect so popular right now. 


I used some baker's twine to tie off the tops and the Chalk Marker to write the dishes the ladies brought to share so we could tell the onion dip from the spinach dip (which look eerily similar sitting next to each other on the table...).


Thanks for stopping by! Now you're off to Helen's blog.

Sunday, December 8, 2013

Truth in the Tinsel: Days 3 - 8

Not that we're a little behind or anything, but here are the last five days of projects from our Truth in the Tinsel project:

Day 3: Zechariah

Little Man wanted to color his own ornament so he used white crayon on brown construction paper because he wanted Zechariah to be white "like he'd seen a ghost because that's how I'd be if I saw an angel!" I tried to give him a marshmallow to put on but he ate it.

Day 4: Gabriel

Again, Little Man wanted to do his own thing so after rummaging through the craft bin, he found feathers and a white, sparkly pom pom for the angels head "to help him glow". I love his imagination!

Day 5: Mary

This is the best picture I got of his ornament today, Missy had a hard time keeping this one on the tree for some reason. Little Man used a round clothes pin and wrapped a fabric square around and colored in her hair and face with a marker, because "if God thinks she's beautiful, then she was."

Day 6: Mary & Elizabeth

This was a fun day even though Little Man kept asking if I was going to have another baby. I asked him if he wanted another sibling and that got him quiet again... :)

Day 7: Song

This day's project is MIA. I don't know if I should blame Missy or the dog.... Basically, he drew a music note on paper, cut it out and colored it in with a marker. I tried to encourage more creativity (or use of supplies) but I think he was tired and ready for bed.

Day 8: Sun

I got a little more conversation out of him during this project. He actually remembered that one of Jesus' names from earlier in the project was Light of the World and he remembered doing this craft last year. Oh my! The memories do stick!!

Missy wanted to be more involved in this project so I peeled the backs off some foam shapes for her to play with. Unfortunately, once she sucked on them she couldn't make them stick. Hmm, wonder why? :)


We've really enjoyed the new printable ornaments this year, it's been a lifesaver with Missy seeing what Little Man is doing and wanted to be a part of it. I strap her in the chair beside me and can surpervise both of them at once. She ends up coloring more on herself than the paper but if I remember correctly, last year wasn't smooth sailing in the the mess-free department either. Oh well! The point is that they are having fun and even looking forward to it. Now when I say it's craft time, Little Man fetches the Bible before the craft supplies - and that is worth every ounce of energy I put into it!

Wednesday, December 4, 2013

Truth in the Tinsel, Days 1 & 2

A little behind schedule but here are the first two of our projects with our Truth in the Tinsel project ...


Little Man insisted on using glitter glue because it's shiny and will look better for a King. It's hard to argue with his logic sometimes, so we modified our crafts a little bit to accomodate his preferences. 

After last year's experiences I was a little apprehensive but plugged along through it and was pleasantly surprised! Little Man listened patiently through the first few verses then asked if he could work on his craft while I read. I got him started then kept reading. When I was done, I asked him a few questions and he gave me the right answers! Wahoo!!

Day one with Truth in the Tinsel

 For Day Two, Little Man wanted to switch glitter glues and chose one with gold flakes in it "because kings like gold". He also wanted to cut the crown himself because I was making it too small - "a good king has a tall crown". But again, he wowed me with his listening skills and was able to tell me some other names for Jesus.
Day two with Truth in the Tinsel

 Missy had her markers to color her ornaments but was more interested in coloring her belly! I am glad I had the foresight to strip her down first. Her contribution to the project was a wet, soggy mess so I may just use pictures for remembering the process instead of the ornaments.... but oh, how cute!!!


I will be posting our completed projects on my blog during the month, so stop back to see more of our creations! If you would like to follow along, it's not too late! Use the link below and LAVENDERSAGE in the check out section for a 20% discount on the book.


Sunday, December 1, 2013

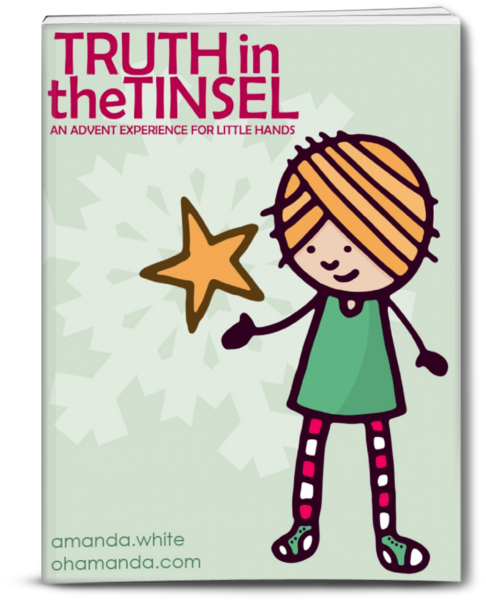
Truth in the Tinsel starts today - and a coupon code!

Today is December 1st and we'll be starting our "Truth in the Tinsel" Advent adventure today. If you haven't gotten your copy to do it with your family and you want to, you're in luck! Amanda has graciously offered 20% off the ebook with code LAVENDERSAGE. Use the link below and add the code during check out.

I am affiliate of Truth in the Tinsel. Thank you for your purchase!

I'll be posting pics of the ornaments my kids make as we go through the book. So stay tuned!!

Friday, November 29, 2013

The Start of Christmas

Now that the turkey is in the fridge and the dishes are done, it's time to bring out the Christmas decorations!

In our house, the day after Thanksgiving is dusting off the Christmas decorations from storage and hanging lights and garland. This year will be no exception ... but it will be more fun because my oldest is big enough to help - and he's willing!!!

We'll get a real tree in a few weeks but I have a small artificial tree my parents bought for me for my first apartment. Over the years I've decorated it using different themes and after I got married, my tree started to look similar each year. So four years ago, I left it decorated when I put it into storage and two years ago, I hot glued the decorations in place. Now it's super easy to have the house decorated in a day with two young kids.  {*smile!*}

Since it's obvious that I don't spend a lot of time (or energy) decorating my house, I thought I would share what we do spend our time on during the Christmas season - Jesus!

Last year, I heard about Truth in the Tinsel, an e-book by Amanda White. I went through the experience with my then four-year-old and while it wasn't as idyllic as I imagined, over time my son started telling me the different activities we did so something must have stuck. I did enjoy the experience so I became an affiliate to help promote the book because it worked for my family.

As I was preparing for this year's experience, I saw there is a download for those with younger kids or those with little time to create. It's printable ornaments that kids can color in then hang on the tree - super simple! I'll be trying the book's crafts with my five-year old but letting my 20 month old do the printable ornaments. We'll decorate our real tree with the kids' ornaments so they have ownership over the holiday decorations.

I will be posting our experience blog over the next few weeks and I would love it if you would join us! Use the link to buy the book and the ornaments and we'll start together on December 1st. But don't worry about doing each activity on the day or even starting on December 1st. Use it how it works best in your family whether that is daily, every few days or only on the weekends.

Use the link below or the link in the sidebar to purchase your copy of "The Truth in the Tinsel". Watch it make a difference in your family. It has in ours.


{I am affiliate for "Truth in the Tinsel". I became an affiliate because this book has made a difference in our house and I believe it's message can make a difference in yours.}

Sunday, November 10, 2013

Picture My Life


If you've ever thought about it, now is a great time to join Close to My Heart! Whether you want to earn extra money, earn a free trip to Costa Rica or get your scrapbooking supplies at a discount, when you become a consultant you could get a *FREE* Picture My Life Scrapbooking program! Contact me for more information that could change your life!

Saturday, November 9, 2013

Joyful Stars Blog Hop: Huntington for Christmas

Welcome to the Joyful Star Blog Hop for November! If you're coming from Krista's blog you're on the right track. It's a circular hop so if you're just starting here then you can just go 'round till you end up here or you can check out the whole list on Joyce's blog.

As I was working on my Huntington WOTG I had a few pieces left over so I thought I would make a layout for our Christmas Eve pictures. I chose the Make It From Your Heart vol 2 layout pattern #12. ( I did make it my own to fit the photos I wanted to use.)


 I used the Glitz gel in Silver, Green, Almond and Red to embellish this stamped image in the corner of the layout.


I stamped the swirls image three times then embellished with the Glitz gels and pop dotted the tree also embellished with the red Glitz gel. I had fun playing with the Glitz instead of other embellishments and once left sit overnight to dry were a fun way to dress a layout up.

Now head on over to Nickie's blog. See you next month!


Wednesday, October 9, 2013

Joyful Stars Blog Hop: Sarita Layout

Hello and welcome to the October Joyful Stars Blog Hop featuring new products from the Autumn/Winter 2013 Idea Book. 

If you came here from Lori's Blog  you're on the right track.  It's a circular hop, so if you're starting out here  you can keep going 'round till you come back again. 

Today I'm going to share with you one of the layouts I made using the Sarita  paper pack. This was a fun pack to work with because it stretched my imagination. The patterns are very new to me trend-wise so it took a little concentration and research to design layouts I would really like. While I liked all the colors possible in this paper pack, I found I stuck with the yellows and blues because I knew I would find pictures that would work well with them.

CTMH Sarita Layout by LavendersageDesigns.blogspot.com

CTMH Hemp Twine on a Sarita layout

Fun wooden accents from CTMH

Now you're off to Cindy's blog! It's a circular hop so you can pick up anywhere but for a full list of participants, check out Joyce' blog.

Friday, October 4, 2013

Lookie what I made!

I do have a lot of scrapbooking and cards to post but instead I'm going to share with you something new. Something fabulous. Something *I* made.

I know. I show you stuff I make all the time but this time... well, it's different!

Since our town's Farm Show is starting next week and the Mr and I have other plans for the weekend, I had to make the kids' outfits for the Baby Parade today. The bigger kids can deal with an adult sized tshirt. The baby can't. I attempted something today that concerned me but I did it anyway. And I really can't believe how well it turned out!!!!!

I took an adult sized tshirt and made a toddler sized tshirt from it!!! If you know me, I don't sew. I'm learning but there are things (like clothes) I have not attempted. Bean bags, yes. Actual clothing, no.

Here is the result....

Before and after: toddler shirt from adult tshirt


After: toddler tshirt from adult tshirt


Here is the part that made me cry - the underarm sleeve seams line up!!!!! I was literally crying when my husband came downstairs... he thought I was even crazier when I told him why! But when it was all said and done, he said he loves that his wife can sew. Which is a huge complement, because in reality, I can't. :)


{Now, a shout out to Delia Creates. She doesn't even know who I am but I have been stalking her blog forever and because her tutorials look so easy I had the confidence to try something like this. If you are even interested in sewing, I ask you to check her out!}

Monday, September 9, 2013

Joyful Stars Blog Hop: Base & Bling


 photo JoyfulStarsBlogHopBadge3_zpsa824a544.jpg

Hello and welcome to the September Joyful Stars Blog Hop featuring new products from the Autumn/Winter 2013 Idea Book. 

If you came here from Krista's Crafty Corner you're on the right track.  It's a circular hop, so if you're starting out here  you can keep going 'round till you come back again. 

I used our new Base & Bling collection to make headbands for me to wear. I bought a pretty fall cardigan in a color I would never pick out for myself except I saw it on a friend of mine and loved it. Once I got it home I realized I had no accessories to go with it, so I headed to my scrapbooking room to solve my problem. 


I used the Chocolate Striped Ribbon, the Honey fabric from the Sarita Textiles and a glitz button from the Babycakes Assortment.

Using a needle and thread, I made a running stitch along one side of the ribbon cut to 18". Pulling both ends of the thread curled the ribbon on itself to make the flower. I tied the thread to keep it together. Then I did the same thing with the Honey fabric cut to 1" x 12". Going through my Babycakes Assortment I wanted to use a button with a Slate jewel and chocolate button but I didn't find one (or I used it on another project) so I colored the wood button with the chocolate marker. I then hot glued the ribbon, fabric and button together and let it cool. Once cool, I used an adhesive jewel dot to attach to the headband. 

All together, the project took me about 20 minutes to figure out and assemble (I'm learning the sewing stuff as I go so you'll be quicker than I was!) and it looks so adorable on! 

I'm making more, one for each outfit! It's a quick and fun way to use up my scrapbooking supplies!

Now you're off to Helen's Blog!

Tuesday, September 3, 2013

September is National Stamping Month

September is National Stamping Month

and Close to My Heart has a fun treat just for you!


This exclusive triple stamp set is yours for just $10 with qualifying order in September. Join the September Mystery Hostess on my website to be entered to win the Hostess Rewards (if all orders together earn them).

Did you notice there's something "missing" from the latest Idea Book? Close to My Heart has a special treat for the holidays this year - a special mini book stuffed full of holiday goodies! You'll be hearing more about this book in the weeks to come so stay tuned for sneak peeks!

Friday, August 9, 2013

Joyful Stars New Product Blog Hop: Babycakes

Hello and welcome to the August Joyful Stars Blog Hop featuring new products from the new Idea Book. 

If you came here from Nickie's blog you're on the right track.  It's a circular hop, so if you're starting out here  you can keep going 'round till you come back again. There is a list of participants at the bottom of the post if you want to skip ahead. 

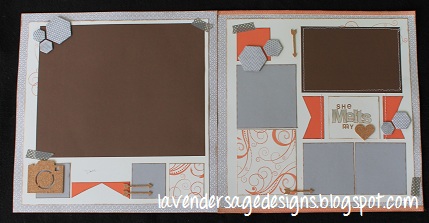
I've been working on this layout in my head for awhile because I started with the right page from the Idea Book but since it's from the Reflections How-To Program book and doesn't suggest a left side page design, I had to work on it myself. *sigh* I really like how CTMH does all the planning work for me, so having to design something myself is time consuming... but I suffered through and after about the third sit-down, I finally have something I like. 


I wanted to use the same pattern but vary the sizes of the squares to make it stand out but it wasn't until I decided to use an 8x10 photo mat did the layout come together.


I enjoyed using some of new Irristables Hexagon shapes, very easy to ink up and stick to the page.


The new cork shapes are fun to use, they come in lots of shapes and sizes and given that they already have adhesive makes it super easy. Just peel and stick!


I also tried a new-to-me technique - sewing! I finally got my sewing machine fixed (okay, the problem was really the user but I got that fixed but finding a good instructor!) and I've been playing! I am thrilled with how easy it is to add a little panache to the page with some stitches. I will be experimenting with some of our stitches stamping sets so stay tuned for some more on this topic!

The blank spot on the left side is where I will place the date of the photos when I finally decided which ones to use. For now, my scrapbooking style is to make the page then find photos to fit. I have so many photos to preserve from the last many years that I can't work in any order at this point. 

Now you're off to Hellen's blog!

Here is a list of participants  so you can pick up anywhere. These are direct links to their blog hop posts (unless noted) so if you're tuning in late, you'll be on track. Feel free to visit each blog and check out all that they have to offer!

Thursday, August 1, 2013

Fall/Winter 2103 Idea Book is now available to order!

Have you heard about any of the new products coming in the new Idea Book? No more waiting!! It's here!!!!


Check out my website to see all the new goodies for yourself!!!!

Here are some links to my favorites so far:

Huntington paper pack and accessories (this layout features my friend Elizabeth and her family!!)


Make it From Your Heart vol. 2

and of course the Artbooking Cricut collection:


Want to see the goodies in person? Come to my Open House on Friday, August 9th from 5-7pm. Email me to save your spot!

Other classes are:

August 23: Base and Bling Workshop - Necklace Kit RSVP by 8/12. Cost is $18pp. Perfect for mother/daughter, sisters or best friends to make together! 


Christmas Card Workshop 9/28 from 9am-4pm in Martindale. Cost is $35 RSVP & early bird discounts available. Email me for your application. 

Artbooking & My Crush workshops available, please contact me if interested!

For more inspiration from the new products in the Fall/Winter 2013 Idea Book, check out the blog hop I'm participating in. I will have another hop on August 10th so check back then too for more goodness!

CTMH New Product Blog Hop: Babycakes card


I am so excited for the new Idea Book and have been devouring it for the last few weeks (consultant perk- yea!!) but since it's new to you, I thought I would participate in a new product blog hop to make it easy for you to browse lots of consultants favorite new products, all of which are available TODAY!!!!

Not sure what a blog hop is? At the bottom of this post, you will see a list of blogs. Click on each one to view their artwork then click on the next link and so on. Lots of inspiration in a short time. Grab a cup of coffee and enjoy!

Babycakes Card


I could not wait to use this cute paper! Since I'm still working on Grace's baby album (gasp!) I will be using this paper a lot in her album. I love the yellow and gray together but the orange and brown really settle it down to be more versatile than just for babies. This would be a great paper pack for fall, back to school, farm life or anything outdoorsy. 


I chose "Love This" stamp set (featured with the My Crush Bluebird set, available end of August) to use because I wanted to feature the butterfly with Buttercup and Sunset alcohol markers. I also used the alcohol markers to color in the bitty sparkles so they wouldn't get lost on the page by being clear.


Here's a list of the products I used in this card: Swing Card set, Babycakes paper pack, Babycakes Assortment, Whisper cardstock, Love This stamp set, Buttercup alcohol markers, Sunset alcohol markers, Chocolate stamp pad, Whisper stamp pad, 2 1/2" scallop circle punch (retired).

Now you can begin hopping! Enjoy!

"This blog hop is open for members of the CTMH Blog Boosters. Please do not enter if you are not a member of the group."

Monday, July 15, 2013

Using CTMH Page Protectors in Your CM Albums (video link)

A sister CTMH consultant has published a YouTube video showing how to convert CTMH page protectors to fit into CM albums. This is great information for anyone who needs to add to their CM albums but doesn't have CM pages to use.

I'm providing the link instead of video because I want you to make her feel loved with pageviews to thank her for the time to put this video together.

Check it out here:  http://youtu.be/u5rIJlpQEpY

Have a great Monday!

Tuesday, July 9, 2013

July's Joyful Stars Blog Hop

Hello and welcome back to the second month of the Joyful Stars Blog Hop!

If you came here from Crystal's blog you're on the right track. It's a circular hop, so if you're starting out here  you can keep going 'round till you come back again. I posted a list of participants at the bottom of the post so you can pick up anywhere but please note that these links take you directly to their blog not the blog post so if you're tuning in late, you'll have to hunt a bit (though I'm sure you'll enjoy the search!).

Since I've been busy with vacations, vendor shows and convention I haven't had much time to create anything I can show you (but come back next month and I'll have loads to share!) so I searched through my albums till I came to a layout I haven't shown you yet.


I used the Later Sk8r paper pack (only available till the end of the month, *sob*) and stickease to make this layout (it is part of the Workshop on the Go) and I used photos from June 2012 Transport for Christ Regional Truck Show in Lebanon PA. I love this paper pack because of the diamond-plating pattern is all over my photos anyway - this ties my photos to the paper very well! The stickease and WOTG stamp set were perfect to stock up on because this is one set I will use over, and over, and over again! There simply is no shortage of truck pictures in my albums!


Now you are off to Helen's blog. See you next month!


Joyce Houck             Joyce-joyfulcreations.blogspot.com

Nickie Hoffer            nickiehoffer.blogspot.com

Nancy Brown            creativelyartsygallery.blogspot.com

Lori Meadows           CraftyMeadows.blogspot.com

Stephanie Brown       stephanielovesscrapbooking.blogspot.com

Heather Flaherty        papercrafteranonymous.com

Crystal Davis             craftingwithcrystal.blogspot.com

Stephanie Huber         lavendersagedesigns.blogspot.com

Hellen Gullett               byheleng.wordpress.com

Elizabeth Mindemann   ejoym.blogspot.com

Krista Hershberger     Kristascraftycorner.blogspot.com

Betty Locco                scrapbookgirl2.blogspot.com

Jean Murphy               stampandscrapjeanie.blogspot.com

Cindy Leek                 savingmemorieswithcindy.com

Meredith Hainsworth    craftyschemings.blogspot.com.

Tuesday, June 25, 2013

A Quick Look at my Quick Pic Albums

I'm heading off to convention tomorrow and I wanted to share with you something I have been working on. I made two Quick Pic albums recently using up some leftover scraps from two paper packs in about an hour each. Take a look and let me know what you think!


You can purchase your Quick Pic Albums under "While Supplies Last" for only $2!!!

Sunday, June 9, 2013

Joyful Stars Blog Hop: Anything Goes: Mother's Day Card

Hi and welcome to the new Joyful Stars Blog Hop. Each month this blog hop will have a different theme and this month Anything Goes! All projects will feature Close to My Heart products which you can obtain from your consultant. If you don't have a consultant contact any of the participants in the blog hop (pick me! pick me!) for more information.

If you've come from Crystal Davis' blog, you're on the right track. This is a circular blog so jump in here and follow it till you come back.  For a complete list of blogs participating, check the bottom of this post.

If you're new to my blog - welcome! Stay and look around before jumping on to the next blog (or Follow me so you can see my new posts). I look forward to getting to know you!

My entry today is the card I made for my mom for Mother's Day.


 I mixed my paper packs {gasp!} and used "For Always" and "Chantilly" scraps with black and white daisy cardstock. I used "Perfect Fit - Mom" stamp set and black and Blush ink. I used the 2 1/2" scallop punch to make a scalloped circle that I sponged the edges in blush ink. I stamped the outside image in black ink and the "MOM" in blush. CTMH's clear acrylic stamps and blocks make it so easy to line up multiple images the first time!

I layered my scraps using a 1/8" border based on the smallest scrap I had so no fancy measurements on this one. A simple, quick card I made with scraps I had on hand. And because it's handmade, it's made with love! All for the "World's Greatest Mom" - mine! :)

If you're following the blog hop, you're off to my friend Elizabeth's blog - you'll love her! See you next month!

Joyful Stars Blog Hop Complete Listing 
(these are links to their blogs not to their blog hop posts)

Joyce-joyfulcreations.blogspot.com                                     
              Joyce Houck
Kristascraftycorner.blogspot.com                                       
               Krista Hershberger
nickiehoffer.blogspot.com                                              
                   Nickie Hoffer
creativelyartsygallery.blogspot.com                                    
               Nancy Brown
stephanielovesscrapbooking.blogspot.com                                
         Stephanie Brown
craftingwithcrystal.blogspot.com                                       
                 Crystal Davis
lavendersagedesigns.blogspot.com                                       
             Stephanie Huber
ejoym.blogspot.com                                                     
                     Elizabeth Mindermann
scrapbookgirl2.blogspot.com                                            
                  Betty Locco
stampandscrapjeanie.blogspot.com                                       
             Jean Murphy                
              Meridith Hainsworth
           Helen Gullett  

Monday, June 3, 2013

A friend's Chantilly card

Back in April I participated in my upline's team swap featuring Chantilly cards. I showed you mine here.

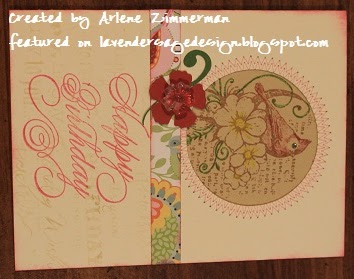
Today, I want to share with you one of cards I received that blows my mind. My friend Arlene Zimmerman created this card and her artistic skills astound me!

Her card is a simple design using a strip of the Chantilly paper with a flower and vine cut using Artiste but what gets me everytime I look at this card is her stitching!


 Arlene used colored pencils to highlight parts of the stamped image in the background to complete the card.


Isn't it awesome?! I love this card and have it hanging on my inspiration board. I would love to try stitching on my artwork but while  I lack a reliable sewing machine right now, I lack the vision of it. I'm hoping once I try it I'll like it and will be able to get more creative as my skills improve. Until then, I look at Arlene's dreamy card.

Special thanks to Arlene Zimmerman for letting me share her card on my blog.